When the spring repotting window opens
The window opens when two conditions align: daylight has crossed roughly 11 hours, and the plant has pushed at least one new leaf or visibly extended a stem. In southern Sweden, Denmark, and central Norway that lands in the second or third week of March; in Helsinki and northern Norway, closer to early April. South of Hamburg, the window can open in late February.
Photoperiod is the trigger most people miss. Indoor temperature changes very little between January and April in a heated Nordic flat, but the plant reads daylight, not the thermostat. Roots break dormancy 2–4 weeks before visible top growth — repot too early and the plant has no metabolic budget to grow into the new soil; repot too late (June–August in heated rooms) and the disturbance lands on a plant already pushing its hardest growth, costing weeks of progress.
Practical rule: wait for the first new leaf, then repot any candidate plants over the following 4–6 weeks. The window stays open until late May for most species — by mid-June, even in southern Scandinavia, summer's heat plus active growth makes recovery slower.
Which plants actually need repotting this spring
Most houseplants do not need annual repotting. The signs that one does are concrete and visible — and applying them ruthlessly will save you several plants from unnecessary disturbance. Repot if you see two or more of these signals.
- ·Roots circling the drainage hole, or a thick mat visible when you tip the pot.
- ·Water runs straight through within 5 seconds of pouring — the root mass has displaced most of the soil.
- ·The plant dries out in 2–3 days when it used to take a week or more.
- ·Soil has compacted, pulled away from the pot edge, or smells sour.
- ·Growth has stalled despite adequate light, water, and feeding for 2–3 months.
- ·The plant is visibly leaning or top-heavy because the rootball cannot anchor it (see why is my plant leggy for the lighting-related sibling cause).
- ·It is a fast grower (pothos, monstera, philodendron, calathea) and you have not repotted in 18+ months.
- ·It is a slow grower (snake plant, ZZ, mature ficus) and you have not repotted in 3–4 years.
Plants to skip — even in spring
Spring is permission, not obligation. Several common houseplants are better left alone this year, and forcing a repot can reset months of growth.
Sansevieria (snake plant) and ZZ plant are happiest when slightly root-bound — they bloom and pup more reliably in a tight pot. Repot only every 3–4 years, and only when the rhizomes are visibly cracking the pot. Plants currently in bud or bloom (peace lily, anthurium, orchids, African violets) divert resources from flowers to root recovery if disturbed — wait until flowering finishes. Sick or pest-infested plants should be diagnosed and recovered first; repotting compounds the stress and can finish a plant already declining from root rot or fungus gnats.
Plants you bought in the last 8 weeks generally do not need repotting — the nursery soil is fine for a season, and a freshly-purchased plant is already adapting to your light and humidity. The exception is a supermarket plant in clearly degraded peat or visibly waterlogged soil — that case is covered in its own decision guide. Orchids repot on a different schedule entirely: when the bark medium has broken down to the texture of compost (typically every 2 years), regardless of season.
What you need before you start
Spring repotting is one of the few houseplant tasks where preparation matters more than technique. Have everything within arm's reach before you take the plant out of its pot — exposed roots dry quickly, and a 30-second pause looking for the perlite is 30 seconds of root damage.
- 1A new pot 2–3 cm wider in diameter than the current one. Terracotta if the plant is rot-prone (succulents, snake plant, hoya), glazed ceramic or plastic if the plant likes consistent moisture (ferns, calatheas, peace lilies).
- 2Fresh potting mix matched to the plant — chunky aroid mix for monsteras and philodendrons, cactus/succulent mix for sansevieria and jade, all-purpose mix for tropicals. The full recipes are in the DIY aroid mix guide.
- 3Sharp clean scissors or pruning shears, wiped with isopropyl alcohol — for trimming dead or rotted roots.
- 4An old towel or newspaper, plus a tray to catch loose soil.
- 5Lukewarm water at room temperature (18–22 °C) — cold tap water shocks roots already exposed to air.
- 6Optional: rooting hormone powder if you plan to propagate any rootbound divisions, and a small bag of fresh perlite to amend the bottom of the new pot if you are repotting a rot-prone species.
The 8-step spring repotting procedure
Work fast and gently. The whole process should take 10–20 minutes per plant — longer than that and the roots have begun to dry out. The full step-by-step procedure works for any tropical houseplant; succulents and orchids have their own variations covered at the end of this section.
Step 1 — Water the plant 1 hour before
Water the plant lightly the day before, or 30–60 minutes before you start. Slightly damp soil holds the rootball together when you slide it out — bone-dry soil crumbles, exposing more roots to air; sopping-wet soil tears roots when you try to loosen it. Aim for the texture of a wrung-out sponge.
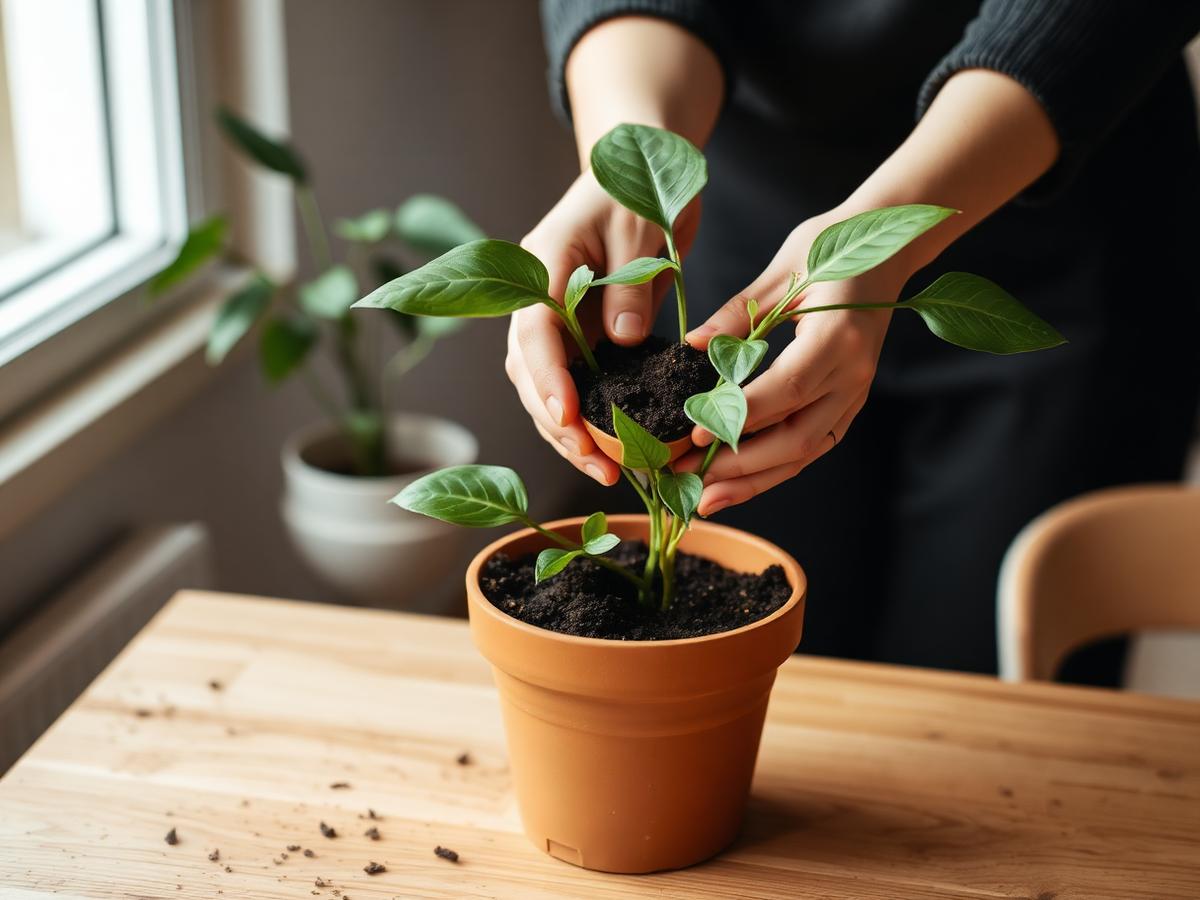
Step 2 — Remove the plant and inspect the roots
Tip the pot sideways and gently slide the plant out. Squeeze a plastic pot or run a knife around the inside edge of a ceramic one if it sticks. Lay the plant on its side and look at the rootball. Healthy spring roots are creamy white to light tan and firm to the touch — they should outnumber the soil. Black, mushy, or sour-smelling roots mean rot; cut every affected section back to firm white tissue with sterile scissors. Circling roots wrapped tightly around the bottom can be teased loose by hand; for severely root-bound plants, score four shallow vertical cuts down the sides of the rootball with a clean knife to encourage outward growth.
Step 3 — Prepare the new pot
Add 2–4 cm of fresh mix to the bottom of the new pot. The depth should be enough that the top of the rootball will sit roughly 1 cm below the pot rim once placed. Skip the "drainage layer" of pebbles or shards — decades of greenhouse research show it raises the perched water table inside the pot rather than improving drainage. A pot with a single drainage hole and a uniform soil column drains better than one with a rock layer at the bottom.
Step 4 — Position the plant
Set the rootball into the new pot. The top of the existing root mass should sit 1–2 cm below the pot rim — too deep and water pools, too shallow and watering splashes soil out. For top-heavy plants, hold the stem upright with one hand while you backfill with the other.
Step 5 — Backfill and tamp gently
Pour fresh mix around the rootball, working it down with your fingers or a chopstick to fill air pockets between roots. Tap the pot firmly on the table 2–3 times to settle the mix — do not press it down hard, which crushes air spaces and starves the roots of oxygen. Stop filling when the mix sits 1 cm below the rim, leaving a clear watering basin.
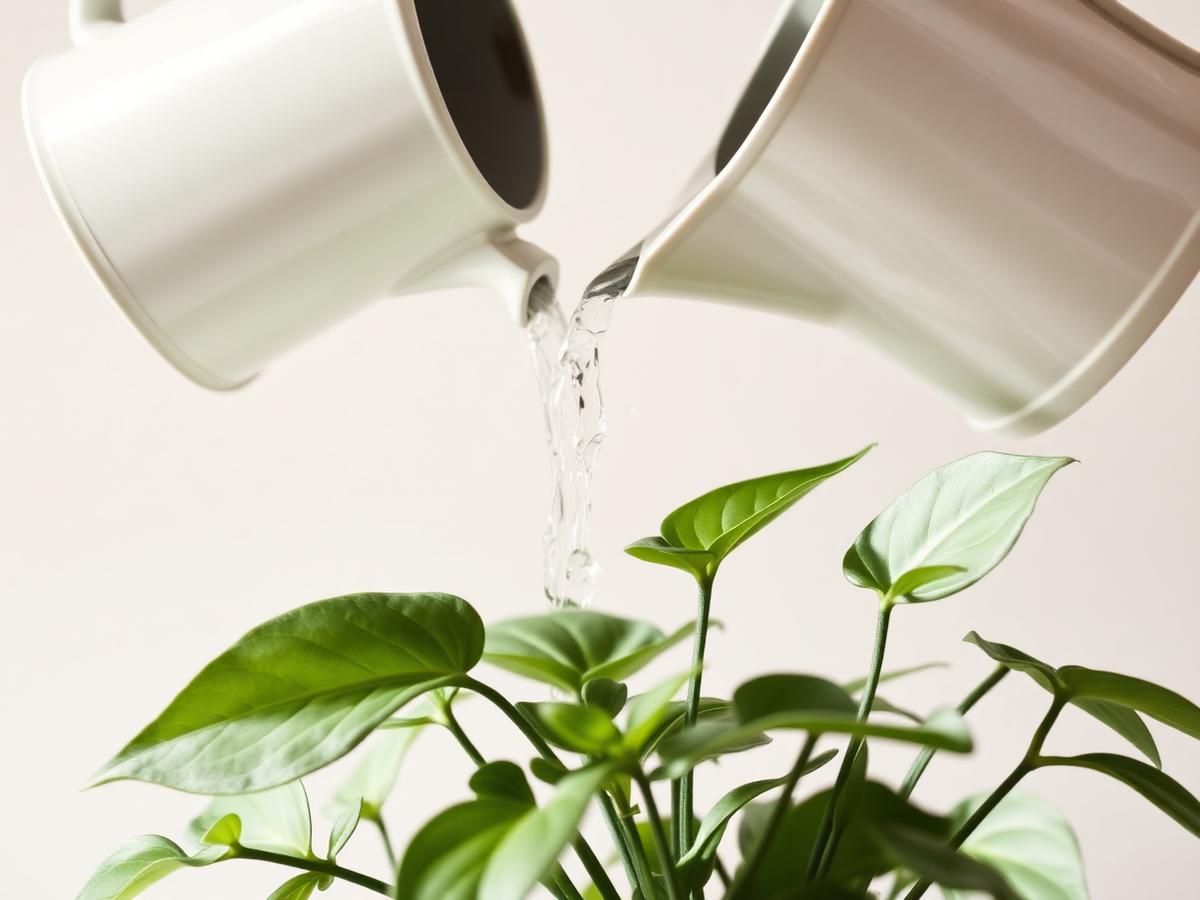
Step 6 — Water thoroughly, then drain
Water slowly and evenly across the entire surface until water runs from the drainage hole. This settles the mix and rehydrates the roots in their new environment. The water-through serves a second purpose: any "wet pockets" of compacted mix become visible — top up with extra dry mix if the surface drops noticeably. Empty the saucer after 10 minutes; do not let the freshly repotted pot sit in standing water.
Step 7 — Place out of direct sun for 1 week
Move the plant to a spot with bright indirect light, 1–2 metres back from any sunny window. Direct sun on disturbed roots accelerates transpiration faster than the plant can replace water — leaves can wilt and burn within a day. Most plants will pause growth for 1–3 weeks while the root system rebuilds; this is normal. Some species (calathea, fiddle leaf fig, monstera) will droop visibly for 5–10 days. Resist the urge to water again — the soil is still saturated.
Step 8 — Wait 2–3 weeks before fertilizing
Fresh potting mix already contains 4–8 weeks of slow-release nutrients in most commercial formulations. Adding fertilizer to a freshly-repotted plant burns root tissue that is actively trying to heal — chemical burn is the second most common cause of post-repot decline after overwatering. Resume feeding at half strength after 2–3 weeks, then return to the normal cadence in the spring fertilizing schedule.
What goes wrong (and how to read the signs)
Even careful repotting carries a 1–3 week recovery cost. The four common post-repot problems and what they mean:
- ·Wilting + soft yellowing leaves within 5 days — the soil stayed wet because the new pot is too large or too poorly drained. Hold off all watering, move the plant somewhere brighter and breezier, and check the rootball in 7 days. If the wilting persists, repot back into a smaller pot with chunkier mix.
- ·Crispy brown leaf tips appearing 1–2 weeks later — root damage during repotting reduced water uptake. The plant will recover; trim the worst-affected leaves and maintain steady watering on the finger test.
- ·Stalled growth for 4+ weeks — pot is significantly too large, or the new mix is too dense. Most fast growers (pothos, monstera) should produce a new leaf within 4–6 weeks of a spring repot in good conditions. If nothing emerges by week 6, check the rootball for unexpected rot.
- ·Sudden fall of multiple leaves — transpiration shock, almost always from too much direct sun in the first week. Move the plant to dimmer light and let it stabilise; new leaves will replace the lost ones over 2–3 months.
Pot sizing — the single biggest mistake
The most common spring-repot failure is jumping a plant into a pot two or three sizes too large because "it has been so long since it was repotted". Excess soil holds excess water that the smaller root system cannot absorb, which is the textbook recipe for root rot. The rule: 2–3 cm wider in diameter, no more, even for a plant that feels long overdue.
If a plant truly needs a much bigger pot — a fast-growing monstera that has visibly outgrown a 20 cm pot — repot up by one size in spring, then again by another size in late summer. Two careful repots in a season cost the plant less than one oversized one. Heavy growers can also be partially divided rather than upgraded: split the rootball, repot each section into a same-size or slightly larger pot, and you have two healthy plants instead of one over-potted one.
After-care — the first 6 weeks
The first six weeks set the recovery trajectory. Keep watering on the finger test only — overwatering a freshly-repotted plant is a faster killer than letting it dry slightly. Hold humidity steady (a humidifier helps for tropicals), and skip pruning, training, or moving the plant for at least 3 weeks. Resume normal light by the second week. Resume feeding at half strength in week 3.
Once new growth resumes — usually a leaf or two within 4–6 weeks for fast growers, longer for slow ones — the plant is back online. From there, return to a normal seasonal rhythm: water and feed through summer, taper into autumn, and pause through the dark winter months as covered in the Nordic winter houseplant guide.