What a Phalaenopsis orchid actually is
The moth orchid is Phalaenopsis (family Orchidaceae) — a genus of about 70 species native to a band of tropical Asia stretching from northern India through southern China and the Philippines down into Indonesia and northern Australia. Almost every supermarket plant is either Phalaenopsis amabilis, Phalaenopsis aphrodite, or a hybrid of the two, bred over decades for thicker spikes, more flowers per spike, and reliable retail blooming.
What matters more than the species is the growth habit. Phalaenopsis is an epiphyte — it grows attached to the bark of a tree, not in soil. Its roots are not for digging into compost; they are anchor cables wrapped in a spongy white tissue called velamen that absorbs water and atmospheric humidity directly from the air. Drench those roots and they go from silver-grey to bright green within minutes — the velamen has filled with water. Leave them sitting wet for days and they suffocate, exactly like an aerial root buried in mud.
The plant is also monopodial, meaning it grows from a single central stem and never produces the pseudobulbs (fat water-storage swellings) that other orchid genera rely on. There is nowhere to store reserves. That is why a neglected Cattleya can bounce back from a month of drought, while a neglected Phalaenopsis cannot — it has no buffer.
At a glance
Phalaenopsis is the most beginner-friendly orchid for one reason: it has no pronounced dormancy and tolerates the warm, even temperatures of a heated home. The trade-off is that it asks you to understand four things: bright indirect light, soak-and-drain watering with tepid water, fast-draining bark instead of soil, and good airflow around the roots. Get those four right and you have a plant that flowers for two to three months at a time, twice a year, for a decade or more from the same supermarket pot.
Most dead Phalaenopsis I have replaced for clients died from one of two things: water sitting in the decorative outer cachepot for days at a time, or being left in a dim corner because the flowers looked decorative there. Neither is a hard problem to fix once you can see it.
Light — and the leaf-colour test that tells you instantly
Phalaenopsis wants bright indirect light: about 10,000–20,000 lux, equivalent to an east-facing window all day, or one to two metres back from a south window. It will tolerate medium light (a north window in summer, or a brighter shaded corner) but will not bloom there. It will burn in direct midday sun within a couple of hours, especially through south-facing glass — the leaves go pale, then develop sunken yellow patches that never recover.
The cleanest test for whether your orchid is in the right light is the leaf colour. A well-sited Phalaenopsis has medium grass-green leaves — not dark forest green and not yellow-green. Dark, almost-black green leaves mean too little light; the plant survives but rarely flowers. Yellow-green or red-tinged leaves mean too much light; the plant is stressed and chlorophyll is breaking down. Move the plant a metre toward or away from the window depending on which way the colour drifts.
If you only have a north-facing flat — common in Nordic apartments — Phalaenopsis is one of the few orchid genera that will still flower under a 20–30 W full-spectrum LED grow light on a 12-hour timer, 30 cm above the leaves. See understanding light levels for indoor plants for the full breakdown by window orientation, and do houseplants need a grow light for when an LED earns its place.
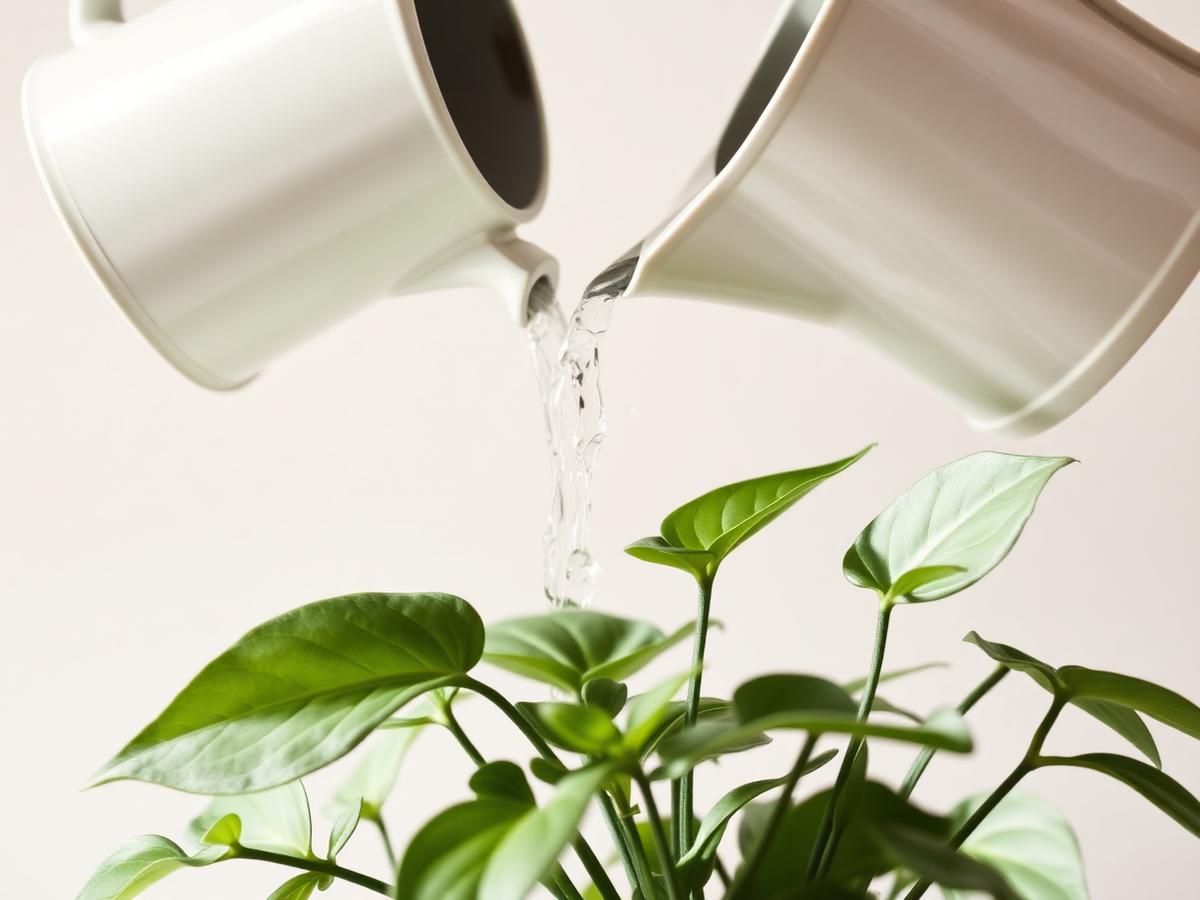
Watering — and the ice-cube myth
There is no orchid plant in the wild getting watered with ice cubes. The ice-cube method went viral around 2014 because it sounded easy and produced reproducible (small) doses of water — but it works against the physiology of the plant. Phalaenopsis is tropical: native habitat night temperatures rarely drop below 18 °C, and the velamen on the roots is structurally damaged by water near freezing. The plants in the original ice-cube studies survived because Phalaenopsis is forgiving, not because the ice was good for them.
The correct method is a thorough soak in tepid water (around 20 °C) every 7–10 days. Lift the orchid out of any decorative cachepot, set it in the sink, and run tepid water through the bark slowly for 30–60 seconds, letting it drain right through. Better still: stand the inner pot in a basin of tepid water for 10–15 minutes — the bark and roots fully rehydrate, the velamen turns vivid green, and the plant has the equivalent of a tropical rain shower. Then drain it completely, let it stop dripping, and return it to the cachepot. Never let water sit in the bottom of the cachepot. That is the single most common cause of orchid root rot.
Frequency varies with the bark. Fresh, chunky orchid bark holds water for 5–7 days in dry winter air and 10–14 days in cool humid summer. Old, broken-down bark holds it longer and rots roots faster — which is why repotting every two years is non-negotiable. Use the finger test at depth and the visible colour of the roots through a clear inner pot — silver-grey roots mean dry, bright green roots mean recently watered.
- ·Roots silver-grey, bark dry to the second knuckle = water now.
- ·Roots green, bark damp = wait 2–4 days and check again.
- ·Roots yellow-brown and mushy = root rot. Unpot, trim, repot in fresh dry bark — see root rot in houseplants.
- ·Roots wrinkled and grey-papery, leaves limp = severely dehydrated. Soak the inner pot for 30 minutes; the leaves should firm up within a day.
- ·Crown wet for hours after watering = blot dry with a tissue and improve airflow. A wet crown is the source of orchid crown rot.
Tap water, fluoride, and what to soak with
Phalaenopsis is moderately sensitive to mineral-heavy tap water — the velamen accumulates dissolved salts faster than it can shed them, and chronic hard-water plants develop yellowed leaf tips and a chalky white crust on the inside of the pot. If your tap water is medium-hard or harder, switch to filtered water, rainwater, or tap water that has stood uncovered for 24 hours (which evaporates chlorine but does nothing for fluoride). See tap water for houseplants and hard water and houseplants for the calibration.
Use water at room temperature — about 18–22 °C. Cold water from a kitchen tap can drop crown temperature by 5–8 °C in seconds, which damages the meristem (the growth point at the centre of the leaves). Watering once a week with a kettle-warmed splash mixed into a basin is the cleanest fix.
Humidity and airflow — the second pair of variables
In the wild, Phalaenopsis grows under tree canopies where humidity hangs at 70–90% all year. Indoor air at 30–35% humidity (typical of a heated Nordic flat in February) is dry enough that the velamen on exposed roots dries out within hours of soaking. The plant survives, but blooms thin out and bud blast — half-formed flowers shrivelling and dropping before opening — becomes common.
Aim for 50–70% humidity around the plant. A small humidifier near the pot is the most effective fix; a pebble tray helps marginally; misting the air around the leaves does close to nothing once the droplets evaporate. Group orchids together — collective transpiration raises local humidity by 5–10%. See indoor humidity for houseplants in winter for the realistic options in a heated apartment.
Airflow matters as much as humidity. Stagnant damp air around the crown is what causes the black rot lines that kill orchids overnight — a small fan running on its lowest setting in the room is enough. Don't aim it directly at the plant; you want air moving, not a draught.
Pots, bark, and why it is not soil
Phalaenopsis must be grown in coarse orchid bark — chunky pieces of fir or pine bark, sometimes mixed with sphagnum moss, charcoal, and perlite. Standard potting soil suffocates the roots within weeks: the velamen needs air around it, and a soil mix has none. If you have just inherited a Phalaenopsis in a soil-style mix from a dubious shop, repot it as soon as it finishes flowering, not before — disturbing a blooming orchid usually drops the flowers.
Use a clear plastic inner pot with at least eight drainage holes. The clear plastic lets you see root colour at a glance — the cleanest watering cue you can ask for. Drop that inner pot into a decorative cachepot for display, but lift it out for watering and put it back only after it has stopped dripping. The supermarket setup with a single foil-wrapped pot and no drainage is the layout most likely to kill the plant; ditch the foil on day one.
Sphagnum-moss-only mounts work for experienced growers and tropical sphagnum-tolerant cultivars but not for beginners — the moss holds water four times longer than bark and rots roots that the grower watered on a bark-style schedule. Stick with bark for the first plant.
Fertilising — weakly, weekly
The orchid grower's mantra is "weakly, weekly" — feed at a quarter to a half of the strength on the bottle, every watering during active growth (spring through autumn). Use a balanced orchid fertiliser (N-P-K roughly 20-20-20 or 30-10-10), or a general houseplant feed at a quarter strength. Skip feeding entirely in deep winter (December–February in northern Europe) when light is too low to drive the plant into anything more than maintenance metabolism.
Flush the bark with plain water every fourth watering to clear accumulated salts. The white crust on the rim of the pot is mineral build-up — a sign the plant is being fed faster than the roots can use, and a leading cause of black leaf tips. Over-fertilised orchids look healthy but produce fewer flowers.
Reblooming — the temperature trigger most beginners miss
When the last flower drops, two things can happen. The plant can rest the spike — go through a few months of leaf-and-root growth before pushing new flowers — or it can sometimes flush a second bloom on the same old spike. Which path you get depends on what you do with the spike and what the plant experiences over the next 4–6 weeks.
On the existing spike: if it is still green from base to tip, you can encourage a side-branch bloom by cutting the spike just above the second node from the bottom (the bumpy ring on the green stem). Each node can sprout a new flowering branch. If the spike has yellowed or browned at the tip, cut just above the highest still-green node. If the entire spike has turned brown and dry, cut it off at the base — the plant will produce a new spike from the crown when conditions are right.
The temperature trigger is the part most beginners miss. Phalaenopsis only initiates new flower spikes after a 4–6 week period of cooler night temperatures — about 15–18 °C nights with 23–25 °C days. In the wild this is the dry-season cue. In a centrally-heated flat the temperature is constant year-round, which is why some indoor orchids never rebloom: they never get the signal. Move the plant to a cooler room (a draught-free bedroom, or near a closed but unheated window) for six weeks in autumn or early spring, and the spike usually appears within 8–12 weeks.
- 1Wait until the last flower has dropped naturally — don't cut a spike with open flowers.
- 2Inspect the spike: if entirely green, count nodes from the base.
- 3Cut about 1 cm above the second healthy node, or above the highest still-green node if the tip has browned.
- 4Move the plant to a cooler spot (15–18 °C nights) for 4–6 weeks.
- 5Resume normal warmth and watch for a new green tip emerging from the crown or the cut node — usually 8–12 weeks.
Repotting — every 2 years, or sooner if the bark crumbles
Phalaenopsis bark breaks down. Within 18–24 months, fresh chunky bark turns into a crumbly mulch that holds far more water than the roots can use. Repotting every 2 years into fresh bark is the single most effective preventative measure for orchid root rot. The signs: bark that pinches between your fingers like compost rather than crackling, water draining slowly through the pot, roots wandering out the top of the pot in search of air, or any visible black-mushy roots.
The right time is right after flowering. Soak the plant for 15 minutes to soften the bark, lift it out, and gently shake the old bark free. Trim any black or mushy roots back to firm green tissue with sterilised scissors. Pick a clear plastic pot just big enough to hold the live roots — orchids prefer being snug; a too-large pot stays wet too long. Repack with fresh coarse orchid bark, working it down between the roots with a chopstick. Water sparingly for the first two weeks while the plant settles, then resume normal soak-and-drain.
If you find a healthy root has died but the leaves still look fine, this is normal — orchid roots have a working life of 18–24 months. As long as the plant has at least 4–5 healthy white-and-green roots, it will recover.
Common problems — quick reference
Almost every Phalaenopsis problem maps to one of five root causes: water sitting at the roots, dry air, dim light, old bark, or cold water on the crown. The diagnostic shortcut:
- ·Yellow lower leaves, soft and limp = root rot from chronic overwatering. Unpot and check roots.
- ·Yellow upper leaves, plant otherwise healthy = too much direct sun. Move back from the window.
- ·Wrinkled leaves, papery roots = severe dehydration. Soak for 30 minutes; recovery within 1–3 days.
- ·Bud blast (buds shrivelling before opening) = sudden environmental change — temperature swing, draught, or moving the plant during budding.
- ·Brown or black spots on leaves = fungal or bacterial leaf spot from wet foliage and stagnant air. Remove affected tissue, improve airflow.
- ·Crown blackened and soft = crown rot from water sitting in the centre of the leaves. Often fatal once advanced — see if any side shoots remain.
- ·Spike turning yellow then brown after flowers drop = normal end-of-bloom dieback, not a problem.
- ·No flowers in 12+ months = no temperature drop. Move to a cooler spot for 4–6 weeks.
- ·Sticky droplets on leaves and stems = guttation (the plant excreting excess water/sugar) — usually harmless, but check for scale insects just in case.
Pests
Orchids are relatively pest-resistant, but the pests that do find them tend to settle in. The four to watch:
- ·Mealybugs — white cottony clumps in leaf axils and around flower spikes. Wipe off with a cotton bud dipped in 70% isopropyl alcohol; treat weekly for three weeks.
- ·Scale insects — small brown bumps along leaves and the spike base. Scrape off with a fingernail or soft brush, then dab with alcohol.
- ·Spider mites — fine webbing under leaves, stippling on the upper surface. Most common in dry indoor air. Wipe leaves, raise humidity, treat with insecticidal soap.
- ·Thrips — silver streaks on flowers and leaves, plus tiny black specks (frass). Particularly damaging to open blooms. Use blue sticky traps and a systemic if persistent.
Toxicity — safe for cats, dogs, and chewing children
Phalaenopsis orchids are listed as non-toxic to cats and dogs by the ASPCA, and have no known toxicity to children either. They are one of the few showy flowering houseplants you can keep in a home with pets and toddlers without anxiety. The flowers, leaves, roots, and spikes are all safe — the worst a cat that chews a leaf will get is mild stomach upset from the unfamiliar plant matter.
If you want a wider list of safe options, see pet-safe houseplants for cats and dogs. For the broader toxicity picture across popular houseplants, are houseplants toxic to cats and dogs is the catalogue.
Seasonal care in a Nordic apartment
Phalaenopsis is a forgiving species in Northern European homes, but the seasonal swing in light, humidity, and temperature does shape the year. The short version:
- ·Spring (Mar–May): Light returns. Resume regular feeding. Often a second bloom flush. Best window for repotting if needed.
- ·Summer (Jun–Aug): Peak growth. Watering may go from every 10 days to every 7. Watch for direct sun through south-facing windows.
- ·Autumn (Sep–Oct): The cooling-room window. Move the plant to a slightly cooler spot to trigger spike formation — this is when the temperature drop matters most.
- ·Winter (Nov–Feb): Watering slows; humidity drops sharply with central heating. Skip feeding. Keep away from radiators and from cold panes — both will damage roots and leaves. See winter houseplant care for Nordic apartments.